Friday, September 30, 2011

Bottled Salsa

I believe I have mentioned on here before how much my husband LOVES salsa. He loves it so much when I found a deal on tomatoes he told me to go ahead and buy 50 pounds instead of the 25 pounds I had planned on.

This is what 50 pounds of tomatoes look like!! 
I think I can go a while without looking at another tomato.

My pepper plants are overgrown with Anaheim and jalapeno peppers, they came in very handy for my salsa making adventure.

Side note, always wear gloves while dealing with peppers, especially ones that have been growing in 100 degree weather. They are extremely hot and the oils from the peppers will burn your hands!
Not that have I experienced this, I'm just guessing that your hands will not be functional for about 5 hours once the burn sets in. And nothing really relieves the pain, even though it was only a handful of peppers. I would suggest that the person that requested the salsa should have to cut up the peppers.

Needless to say, that 50 pounds of tomatoes did not all become salsa. I got about 28 pint bottles of salsa, some I did a little spicier, some are just mild. The rest of the tomatoes either became homemade tomato soup (recipe to come soon, it was awesome) or they got bottled to be able to use at a later date.

The great thing about salsa is you can decided how much of the heat you would like to add. I would start with just a few peppers and taste it and then decided if it needs more heat. You don't want to overload it and then not be able to eat it because it is too hot. Or if you don't want a lot of onion don't add a lot of onion, just up to your preference. 

I also put the tomatoes, peppers, garlic, and onions in my food processor to chopped them up really fine. If you don't have one just dice everything finely, unless you want your salsa to be chunky then just chop them the size you would like it.

Salsa

3 to 4 qt. tomatoes, peeled (we do 4 so there is more salsa)
2 Tbsp. sugar
1 cup vinegar (apple cider or distilled)
3 Tbsp. salt
2 dashes of oregano (I just add this till I think it looks like enough)
2 Tbsp. cumin 

Combine these ingredients in a large pan.
Add the remaining chopped ingredients:

2 large onions
8 cloves of garlic
2 jalapeno peppers
8 Anaheim peppers
3 bell peppers

Bring to a boil. Reduce heat and continue cooking for two hours, stirring occasionally. The longer you cook the salsa, the thicker it gets. Remove from heat and pour into bottles; seal and process 20 minutes. Makes about 8 to 10 pints.

Wednesday, September 28, 2011

Favorite Wheat Bread

Nothing beats homemade wheat bread! It is absolutely divine. Not only is it delicious, it makes my house smell wonderful. 
I was telling a friend from my church how I like to make homemade wheat bread, but that I don't have a grinder to grind the wheat I have. She was so kind to lend me her grinder so that I could make a batch of bread. Thank you Cynthia!
 I have been craving this wheat bread that my wonderful and amazing friend Jody Noakes makes. This is her recipe, and call me bias but it is the best!! 
The hubby and I ate a half a loaf as soon as we could cut into it! I love fresh bread slathered with butter on it. Nothing tops that.
This recipe makes 4 loaves, I froze one since that is all my little freezer would allow to hold, ate one and gave 2 loaves away to some great people. 
To me this recipe is fairly quick, at least for making bread it is fairly quick. In all it took me about 3 to 4 hours from grinding the wheat to pulling those loaves out of the oven. I didn't really time myself so I am not 100% sure. The recipe looks overwhelming, don't worry it isn't hard, it is just very detailed so that even if you are a beginner at making bread you shouldn't have a problem following the recipe. 
Jody uses a Bosch mixer, and I have a large KitchenAid mixer, both handle this recipe well. 
For those looking for a good wheat bread recipe, look no further this one is perfect!

Favorite Wheat Bread

Step 1- Add in order: 4 1/4 cups very warm water
1/2 cup oil
1/2 cup honey
6 rounded cups whole wheat flour, freshly ground
4 tsp. salt
2 Tbsp. instant yeast

Turn machine on low and let mix for a minute or two to start the developing of the gluten. Scrape down the sides with a rubber scraper.

Step 2- Add 3 to 3 3/4 cups flour (or more if needed) until it "feels" right. (Dough will tend to pull away from the side of the bowl, and machine will sound a little bogged down. It will be sticky, but should feel "dry sticky", not "wet sticky".) 

Step 3- Spray lid with Pam and put on mixing bowl. Turn mixer on high and beat 8-10 minutes. 

Step 4- Scrape dough off lid, then scrape dough neatly down off sides and paddles. Let rise until dough lifts lid off the bowl 1-1 1/2 inches. (About 30 minutes.) (With the KitchenAid since the lid doesn't fully enclose the bowl I just covered mine with towel.)

Step 5- Remove lid and scrape off dough. Turn machine on low to "punch" bread down (about 15-20 seconds). Remove both paddles and scrape dough neatly down into bowl. Let "rest" for 20 minutes.

Step 6- Clean counter well. Get out 4 bread pans and wipe out with a paper towel then spray with Pam. Take bowl off machine.

Step 7- Pour about a 4 inch circle of oil onto the counter. Rub it around with your hand. With oiled hand and/or rubber scraper, pull dough out of bowl onto  the counter.

Step 8- Divide into 4 equal pieces. Form into loaves. Pat a little oil on top of each loaf as you form it and place into pan. Put pans in a warm place to rise until double in size. (About 30 minutes.) Set oven to preheat at 350 degrees.

Step 9- Bake at 350 degrees for 33 minutes. (I always check mine about 10 minutes before they are done just to make sure they are baking up nice and brown.) 

Step 10- Remove from oven and let cool in pans a minute or two. Give each pan a good shake to loosen and remove the bread. Place each loaf on a cooling rack. Do not stack pans until they are thoroughly cooled, as they will collect condensation, causing some pans to rust. If using often, DO NOT WASH THE PANS! Just wipe out with a paper towel. This will keep the pans well-seasoned. When loaves are thoroughly cooled, place in a plastic bag.

Congratulations!! You are a bread maker!!

Monday, September 26, 2011

Lubbock County Fair

I got to go to the fair twice this year. Once with my good friends the Hunsackers, and Dave and I made a trip over there today. Dave couldn't go the night I went with the Hunsackers since he had school. We were able to get in for free both times!! 


This is Kristy, her daughter Kylie and I just before the ride started for the "swinging ship", also known as the Tidal Wave back home in Utah at Lagoon. And yes, I got motion sickness. 
The Hunsacker kids had a blast riding the kid rides! Kristy and I only rode one ride and we were good for the rest of the evening. :)


We had to have some fair food!! 
This is Kristy with her fried Snickers, she said it was delicious.


Yummy corn dogs!! I love Bryson's face in this picture!


They didn't have the animals out yet when I went with the Hunsackers, so when Dave and I went today we checked out what they had.


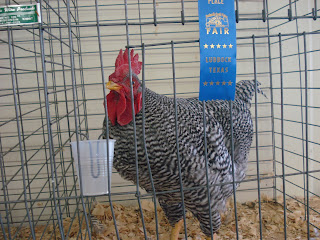
I had to see the chickens. I would like to have some chickens like this one when I get more. 


These geese were in the petting area, though it said to not pet the geese.


They had some chicks hatching from eggs, that was pretty cool to watch! They are amazing how they hatch and get out of those eggs.


Look at those cute little guys! It made me miss my chickens today.


Dave and I have decided we want goats one day, fainting goats.


Tired little piglets.


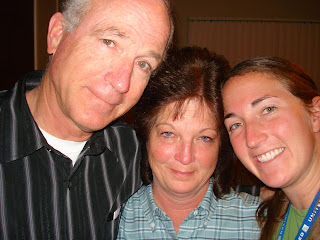
Us at the fair, and some random stranger....


We watched this guy milk a cow.


Fresh milk! I want my own dairy cow some day, then I could make cheese, butter, cream....and all those other dairy products that make my tummy happy.


A very large cow!


I love the cattle barn, they all look so pretty and nicely scrubbed.


Just before I got my Strawberry Yummy.


Doesn't that look awesome?!


This is a better look of this Yummy dessert! 
We pretty much went to the fair to eat food today, we also got potato spirals, a fried peach pie, and some strawberry lemonade. 


This was a first for me, I have NEVER seen a camel at a fair before!


Any one up for a camel ride?? 
I would have totally paid to ride the camel if they had been doing rides while we were there. Maybe next year....

Friday, September 23, 2011

Andes Mint Cookies

I love mint and chocolate cookies!! 
There are one of my biggest weakness. Give me a package of mint Oreos and they will be gone the same day. It's just as bad with good mint chocolate chip ice cream. I just can't say no, they are just too delicious! Now my husband on the other hand thinks mint is only good for toothpaste and gum. He can be a strange fellow at times. I think he is missing out on some great treats! 
Yet, he likes Andes mints.....just not in cookies, explain that one??? 
These Andes mint cookies are so good!!! I could have eaten the whole batch.
I only got to eat one since I was taking them to a church function. I had to make sure they were edible before I let others have some. :)
 I had high hopes there would be some left over to take home so I could eat some with a glass a milk. When I went to get my container, it was empty. 
This made me more happy then if I there was some left over for me to enjoy later. I love it when people like I what make, it makes me truly happy inside. 
Try these cookies, you will love them!

Mint Chocolate Chip Cake Mix Cookies 

1 box Betty Crocker Dark Chocolate cake mix 
2 Tbsp brown sugar 
2 eggs 
1/3 cup oil 
2 Tbsp water 
1 (9.5 oz) bag Andes Mints

In a bowl of a stand mixer, mix the cake mix, eggs, oil, and water together until a soft dough forms. 
Fold in the dark chocolate and mint morsels. 
Drop by the spoonful onto an ungreased cookie sheet and bake at 350 degrees for 8-10 minutes until set in the middle. Make around 2 dozen cookies.


Recipe Adapted From: Real Mom Kitchen 

Wednesday, September 21, 2011

Corn Chowder

Since I had spent a good part of the day in the rain last week, I was ready for a good bowl of hot soup to warm me up. I was trying to decide what kind of soup I should make, there are so many choices! I love creamy soups more then I do broth soups, like chicken noodle soup. Unless its creamy chicken noodle soup that my Aunt makes, I love that soup. 
I decided I needed to use what I had in the chicken, I wasn't going to make any special trips to the store since I was already in comfy clothes for the rest of the day. I remembered this soup recipe I found and I had all the ingredients it required.
This soup was good, and easy to make. 
Though I think next time I would add some green chilies to spice it up a little bit.  I think since moving to Texas I am finding I think almost anything could use green chilies. :)
It goes great with some toasted garlic bread.

Corn Chowder

6 pieces bacon
1 medium onion, diced
2-3 cloves garlic
3-4 Tbsp. flour
3 cups milk 
1 can creamed corn
2 cups cut corn (it said grilled corn is best, all I had was frozen)
4-5 potatoes, boil and cubed
3 Tbsp. butter

Fry up the 6 pieces of bacon. Saute the onion and garlic in the bacon drippings. Add the flour to the onions/garlic mixture and stir constantly for a few minutes. Next add the milk, creamed corn and 2 cups cut corn. Add boiled potatoes. Put the 3 tablespoons of butter into the chowder and let it simmer on low until thick and bubbly. Crumble the bacon on top and soup and garnish with green onions. 

Recipe From: Cowgirl's Country Life

Tuesday, September 20, 2011

Twix Caramel Brownies

Can you say sugar rush??? 
Not only do these brownies have Twixs in them, they also have caramel ice cream topping swirled into the top. DELICIOUS!!
 And of course you have to have a brownie my favorite way, with ice cream on top! That is why I never ever frost my brownies, I always plan to have ice cream on top of   mine. It is the right way to eat a brownie. 
You need to make sure you let these brownies cool completely. You will be able to taste more of the Twix and caramel if you let them cool off. 
These brownies are very rich! I highly suggest a glass, or a mason jar full of milk to go along side this ooey gooey goodness.

Twix Caramel Brownies

1 cup (2 sticks) butter
2 cups granulated sugar
2 teaspoons vanilla extract
4 large eggs
3/4 cup cocoa
1 cup all-purpose flour
1/2 teaspoon baking powder
1/4 teaspoon salt
1 1/2 cups chopped Twix candy bars
1/3 cup caramel ice cream topping
directions:


1. Heat oven to 350°F. Grease a 9 x 13 pan with cooking spray. Set aside.

2. Place butter in medium saucepan on the stove. Heat over medium heat until butter is melted. Remove from heat and stir in sugar and vanilla extract. Add eggs, one at a time, beating well with spoon after each addition. Add cocoa; stir until well blended. Add flour, baking powder and salt; stir until combined. Stir in Twix candy bar chunks. Pour batter into prepared pan.

3. Drizzle caramel evenly over the brownies. Using a toothpick, swirl caramel into brownies. Bake for 35-40 minutes or until brownies begin to pull away from sides of pan and a toothpick inserted in the middle comes out clean. Cool brownies completely in pan on a wire rack. Once cool, cut into squares and serve.


Monday, September 19, 2011

Snickers Salad

Who of you likes Snickers Bars? Who of you likes fruit?
If you answered yes to both of those questions then I know for sure you will love this salad!
I haven't had this salad in a while! My Mom usually makes it for Sunday dinners, or for birthday dinners. So when they came into town last week I decided to make it. 
It is the simplest salad ever! All you will need is Cool Whip, fruit, and 2 regular size Snickers.
 I love the snicker bar surprises with yummy fruit. 


Snickers Salad
2 regular size Snickers, cut into chunks
2 apples, cut into chunks 
Canned mandarin oranges 
1-2 Bananas, sliced 
1 container cool whip 

Mix all ingredients together.

Friday, September 16, 2011

I've Been Crafty Lately

So I can sew!! Well, I had some wonderful help from my good friend Stephanie! Thanks Stephanie!!

I made this adorable baby seat cover for my cousin Krystyn, she is expecting a baby any day now! I don't have any kids, so that means no car seats to test it on. I decided a chair was a good enough.
This was an extremely simple pattern.
Thanks Val for the pattern!! I will definitely be making more of these! 

Isn't this purse cute?! I love it! I have already gotten compliments on it.
 I have been needing a new purse for a while. This was a little harder then the baby seat cover, but Stephanie was great in helping me sew it together properly.
I have decided I need to sew more often, it's fun and I like that I can make my own stuff. 
Now if only my husband would finish my quilting frames so that I can finish that quilt I started almost 4 years ago. 

Wednesday, September 14, 2011

Pumpkin Chocolate Chip Bread


This pumpkin bread is by far the best pumpkin chocolate chip bread I have had!! It was absolutely divine!! To me nothing says fall like pumpkin bread. Now if only we were having fall like weather here in Lubbock. We did the day I made this bread, but since then things have heated up. Now I doubled this recipe, cause honestly who has 15 oz. cans of pumpkin laying around when the only size I ever find in stock is the 29 oz ones?? It made a ton of bread!! I got 8 mini loaves and 2 9x5 loaves. So worth it! It is so moist and full of wonderful flavor.
 Have I mentioned how much I love nutmeg and cinnamon together?? It's great!
Now I didn't have whole wheat flour so I just used all white flour. 
Do yourself a favor and make this as soon as possible!!

Pumpkin Chocolate Chip Bread

*Note: This bread tastes best when it has cooled completely for a few hours and tastes even better the next day.
*Makes 2 (9X5-inch loaves) or 3 (8X4-inch loaves)

2 ½ cups white flour
1 cup whole wheat flour
3 cups granulated sugar
2 teaspoons baking soda
2 teaspoons ground cinnamon
1 teaspoon ground nutmeg
1 teaspoon salt
1 (15 oz.) can pumpkin puree (not pie filling)
1 cup canola or vegetable oil
4 large eggs
2/3 cup water
1 cup semi-sweet chocolate chips

Preheat oven to 350 degrees F. Grease two 9x5-inch loaf pans or three 8x4-inch loaf pans. 
In a large bowl, mix flours, sugar, baking soda, cinnamon, nutmeg and salt together. Set aside.
In a medium bowl, whisk together canned pumpkin, oil, eggs and 2/3 cup water until well combined and stir into dry ingredients, just until the dry ingredients are moistened and no dry streaks remain. Stir in chocolate chips. Pour batter in prepared pans.
Bake the bread for 60 to 70 minutes or until a toothpick inserted in the center comes out clean. Remove the bread from the oven and let sit for 10-15 minutes. Run a knife gently around the edge of the bread and turn the bread out, right side up, onto a wire rack to cool completely.

Tuesday, September 13, 2011

A Weekend With the Parentals at The National Cowboy Symposium

My parents were able to fly down and come spend this last weekend with me. Dave was only here when they flew in on Wednesday, Thursday after work he hopped on a flight to Los Angeles to go see the Utah Utes game with his good friend Brett.

We went to Rudy's BBQ for dinner Wednesday. We all got something different, but I would say that rib my Dad is eating is to die for!

I believe my Dad thoroughly enjoyed them!

The Hubby and I

My parents in front of the Lubbock Temple.

Thursday I had to work, so my parents hung out at my house. Have I mentioned my Dad and I like cowboy movies??? My poor Mom had to sit through and entire evening of one cowboy movie after another. But I'm not sorry about it, sorry Mom! :)

We went to the National Ranching Heritage Center on Friday. If you ever get the chance to go there, do so! It's pretty neat and it's free!

We celebrated my Mom's birthday later that evening. Her birthday is today. Happy Birthday Mom!!! I hope you have a wonderful day! I love you and am so glad you are my Mother!

I hope you like your new shirts!

Saturday we celebrated my Dad's birthday since I wasn't there to back in August. We went to the National Cowboy Symposium and Celebration. 
That was quite a fun experience. There was people reciting cowboy poetry, singing all types of cowboy songs, vendors, and lets not forget the man that had the harmonica station. 

He also got to show off his talent, my Dad really liked him since my Dad has taught himself how to play the harmonica. He got to ask him some pointers on how to improve on the harmonica.

There was trick ropers,

Horse trainers,

Chuck wagons,

And of course chuck wagon viddles! We got to sample the cooking from 3 different chuck wagons, this one was from Cocklber Camp. The chicken fried steak was pretty good, everything on this plate was actually. Except for that cobbler, it had a bubblegum taste to it that didn't agree with my taste buds.

This was from Hawk's Nest. The fried steak was good, but where was the gravy?? And those beans, they were a little bland as were the potatoes.

This plate was from Shadow's Peak, my opinion is that this plate was the best. The fried steak had good flavor, the potatoes were good as were the beans. And the cobbler did not taste like bubblegum! It was quite tasty!

Aren't these little ponies so cute?!

We ended the evening with a performance from the Sons Of the San Joaquin.
Overall a very good day.

Sunday we went to church, play games and enjoyed some homemade blue cheese burgers.

My parents left yesterday morning...

I tried to get them to stay another week with me, but they have lives to get back to in Utah. Just makes me look forward to the next time they visit that much more!