Showing posts with label Dessert. Show all posts

Friday, November 30, 2012

Simple Cheese Danish

Am I actually posting a recipe?!
It feels like forever since I have talked about food.

Lately I have had a hankering for sugar. I think I am getting a little bit of sweet tooth, which is out of the norm for me. Crazy, I know. I am really good at refusing dessert. As of late though, I have been rummaging through the cupboards to find something sweet.
I was surfing the web a little bit ago and came across the recipe. I saved it, to be able to make it later. When I was looking through my recipes later to make us a treat I stumbled across this little gem of a recipe. I had an extra puff pastry in the freezer, a lemon and a block of cream cheese in the fridge, I was set!
After Dave bit into this wonderful pastry, he informed me it was the best Danish he had ever eaten. That will put a smile on your wife's face.

Simple Cheese Danish
*Makes 6 Danish 


8 ounces cream cheese, light or regular, softened to room temperature 
4 tablespoons granulated sugar 
1 teaspoons grated lemon zest 
1/2 teaspoon vanilla extract 
1 sheet frozen puff pastry, thawed (9 1/2 by 9-inch) 
1 large egg, lightly beaten with 2 tablespoons water 

Adjust an oven rack to upper-middle position and preheat the oven to 425 degrees F. Line a rimmed baking sheet with parchment paper. In a small bowl, stir together the cream cheese, sugar, lemon zest and vanilla. Set aside. 

Roll the pastry into a 12 by 9-inch rectangle on a lightly floured counter, making sure it doesn't stick to the counter while rolling. Cut the rectangle into six 4 1/2 by 4-inch rectangles (cut it in half the long way and then cut each strip into thirds). Transfer the pastry rectangles to the baking sheet, spacing about 1 inch apart. Using the tip of a paring knife, score a 1/2-inch border around the edge of each pastry, then brush the borders with the egg wash (no fear - if you don't have a pastry brush, using your fingers works just as well!). Prick the pastry with a fork every 1 inch or so within the border (see the picture below for a visual). Place a generous 2-3 tablespoons of filling in the center of each pastry and spread it into an even layer leaving the border uncovered. 

Bake the pastries until fully puffed and golden about 12-14 minutes (watching carefully so they don't over-brown). Serve the pastries warm or at room temperature.

Recipe From: Mel's Kitchen Cafe


Wednesday, October 26, 2011

Good Old Classic Muddy Buddies

Some of you probably know this as "Puppy Chow", it is Rice Chex cereal covered in my two favorite things when it comes to treats. That's right peanut butter and chocolate!! Love it! 
There is also a coating of powdered sugar on them as well. For some reason my coating doesn't of powder sugar doesn't come out nice and evenly coated. I am okay with that though cause they still taste amazing.
This is one of those treats that I make myself sick from eating too much of them. I can't help it! Once I start it is hard to not keep coming back to the bowl. I am acquiring a little bit of a sweet tooth as I am getting older in age. I haven't decided if it is a good thing or not.....
This is a wonderful snack to have around the holidays. It is quick and can easily be stored in the fridge for those times when you need to make something ahead of time.
I will warn you again though, you will need great self control when you are by this bowl. They are just to tasty to say no to.


Muddy Buddies 

1 cup semisweet chocolate chips
 1/2 cup peanut butter 
 1/2 cup butter or margarine 
 1 tsp. vanilla
 9 cups Chex cereal 
 1 ½ cups powdered sugar 

In 1 quart microwavable bowl, mix chocolate chips, peanut butter, and butter. Microwave uncovered on High 1 minute; stir. Microwave 30 seconds longer or until mixture can be stirred smooth. Stir in vanilla. In a large bowl, place cereal, pour chocolate mixture over cereal stirring until evenly coated. Pour into 2 gallon food-storage plastic bag. Add powdered sugar. Seal bag, shake until well coated. Spread on wax paper to cool. Store in an airtight container in refrigerator.

Recipe From: Rice Chex Cereal Box

Wednesday, October 19, 2011

Quingie's Caramel Corn

I have been craving this popcorn since October started, though I wasn't planning on making it till around December. As luck would have it though when I went home and surprised my parents a couple weekends ago, my Mother must of had one of those Mother intuitions and said, "We should make some caramel corn!" Oh how I love that woman! 
This is my Grandma's recipe, my Dad's Mom, we called her Quingie. In all honesty I am not sure if that is proper way to spell her name, when I was younger and said it it came out more like, "Queenie". But until I am corrected we will use the spelling "Quingie". Uh Dad, now would be a good time to correct me if I am wrong. Just this once. :)
My Mom always makes this caramel popcorn around the holidays, it is highly addicting! It is also better then any caramel corn you can buy in any store.
It has a nice crunchy caramel coating, but you also get those pockets of gooey caramel chunks in between the popped popcorn. So so good!! You must make this caramel corn this holiday season, no if, ands, or buts!

Quingies' Caramel Corn

6 qt. popped popcorn
2 cubes butter
2 c. brown sugar
1/2 c. corn syrup
1 tsp. salt
1 tsp. vanilla
1/2 tsp. baking soda

Melt butter, brown sugar, corn syrup and salt in a large sauce pan. Bring to a boil, boil for 5 minutes.
 Take off the burner, add teaspoon of vanilla and 1/2 teaspoon baking soda. Make sure you used a larger sauce pan, when you add the baking soda the caramel will foam up in the pan a little. 
Pour over popcorn. Bake at 250 for 1 hour, stirring every 15 minutes.

Wednesday, October 12, 2011

Blackberry Cobbler

I can't believe I haven't posted about this cobbler yet.
It is becoming my favorite cobbler, and it is super simple. It does take an hour to cook, but the ingredients take 5 minutes to throw together.
I am a huge fan of dutch oven cobbler, if it is done right that is. But I'm going to be honest, I would pick this cobbler over dutch oven cobbler any day!
It is the right consistency of cakey for me and has a nice golden crusted top. I don't like cobblers to be all cake and not have that nice golden crusted sugary top to them. For me this cobbler is my idea of a perfect cobbler.
I put blackberries and raspberries in the cobbler this time, I think it was better then just adding blackberries. You could use peaches, cherries, any type of fruit really that you would like to try in a cobbler would probably work in this one.
It is best served with a nice helping of ice cream or whipped cream, both ways are delicious!

Blackberry Cobbler

1 stick Butter
1-1/4 cup Sugar
1 cup Self-Rising Flour
1 cup Milk
2 cups Blackberries (frozen Or Fresh) 
Preparation Instructions

Melt butter in a microwavable dish. Pour 1 cup of sugar and flour into a mixing bowl, whisking in milk. Mix well. Then, pour in melted butter and whisk it all well together. Butter a baking dish.

Now rinse and pat dry the blackberries. Pour the batter into the buttered baking dish. Sprinkle blackberries over the top of the batter; distributing evenly. Sprinkle ¼ cup sugar over the top.

Bake in the oven at 350 degrees for 1 hour, or until golden and bubbly. If you desire, sprinkle an additional teaspoon of sugar over the cobbler 10 minutes before it’s done.

Tuesday, October 4, 2011

Peanut Butter Rice Krispies Treats

I have had Rice Krispie cereal in my cupboard for MONTHS, just waiting to made into these delicious treats! I don't think I can ever have just a regular Rice Krispie treat again!
 I am a HUGE fan of peanut butter in treats or desserts. Peanut butter M and M's are my all time favorite candy out of the candy aisle, well it's tied with a Cadbury Caramello candy bar. :)
Any way, Rice Krispies are an awesome quick treat. I think it is a good idea to keep the few simple ingredients on hand in case you are in need of treat last minute. I made these for my Activity Days girls, (it's a wonderful church calling I have) they were a big hit!! 
I doubled the recipe since the recipe just calls for and 8x8 pan, trust me you don't need to double it unless you want GIANT size Rice Krispie treats! Just do the regular recipe and put it in a 9x13 pan instead of the 8x8 and they will be regular size Rice Krispies. I didn't notice the cooks note about that until after I made them.
 Though there is something though about eating a giant Rice Krispie, it's quite the experience. :)

Peanut Butter Rice Krispies Treats

4 Tablespoons Butter, Unsalted
5 cups Mini Marshmallows
½ cup Creamy Peanut Butter
5-¾ cups Rice Krispies Cereal

Spray an 8×8 casserole dish with nonstick cooking spray. 
In a 4 quart sauce pan, melt butter on low heat. Do this slowly, you don’t want burnt or brown butter here. Once butter has melted, keep heat on low and add mini marshmallows. Once marshmallows begin to soften and melt, add peanut butter. At this point, you will need to constantly stir the mixture so the peanut butter does not burn and the marshmallows can evenly melt (won’t take too long, about 5 minutes or so). Once, mixture is combined and melted, turn off heat and remove pan from stove. 
Add Rice Krispies cereal to sauce pan and stir until evenly coated with mixture. This is sticky stuff so do your best to get it all combined. Pour mixture into casserole dish (it will look very loose). Spray your hand with some nonstick cooking spray and pat down the mixture until firmly compacted. Allow 30-45 minutes for treats to set up…then enjoy! These bars are so gooey, you're gonna love 'em. 

Cook’s Note: This recipe will fit a 13x9 dish just fine. I prefer a slightly thicker bar so I go with the smaller size. Also, for all you budget-conscious shoppers, I have made this recipe with the store brand cereal, marshmallows, butter and peanut butter and these treats still turn out delicious. And if you’re a Krispies treats purist (like my hubby), just leave out the peanut butter, they’ll still be gooey. As with all Rice Krispies treats, they are best eaten the day they are made. Store in airtight container if you don't eat them all the same day. I like to nuke them in the microwave for about 5-10 seconds when they start getting a little stale.

Recipe From: The Country Cook

Friday, September 23, 2011

Andes Mint Cookies

I love mint and chocolate cookies!! 
There are one of my biggest weakness. Give me a package of mint Oreos and they will be gone the same day. It's just as bad with good mint chocolate chip ice cream. I just can't say no, they are just too delicious! Now my husband on the other hand thinks mint is only good for toothpaste and gum. He can be a strange fellow at times. I think he is missing out on some great treats! 
Yet, he likes Andes mints.....just not in cookies, explain that one??? 
These Andes mint cookies are so good!!! I could have eaten the whole batch.
I only got to eat one since I was taking them to a church function. I had to make sure they were edible before I let others have some. :)
 I had high hopes there would be some left over to take home so I could eat some with a glass a milk. When I went to get my container, it was empty. 
This made me more happy then if I there was some left over for me to enjoy later. I love it when people like I what make, it makes me truly happy inside. 
Try these cookies, you will love them!

Mint Chocolate Chip Cake Mix Cookies 

1 box Betty Crocker Dark Chocolate cake mix 
2 Tbsp brown sugar 
2 eggs 
1/3 cup oil 
2 Tbsp water 
1 (9.5 oz) bag Andes Mints

In a bowl of a stand mixer, mix the cake mix, eggs, oil, and water together until a soft dough forms. 
Fold in the dark chocolate and mint morsels. 
Drop by the spoonful onto an ungreased cookie sheet and bake at 350 degrees for 8-10 minutes until set in the middle. Make around 2 dozen cookies.


Recipe Adapted From: Real Mom Kitchen 

Tuesday, September 20, 2011

Twix Caramel Brownies

Can you say sugar rush??? 
Not only do these brownies have Twixs in them, they also have caramel ice cream topping swirled into the top. DELICIOUS!!
 And of course you have to have a brownie my favorite way, with ice cream on top! That is why I never ever frost my brownies, I always plan to have ice cream on top of   mine. It is the right way to eat a brownie. 
You need to make sure you let these brownies cool completely. You will be able to taste more of the Twix and caramel if you let them cool off. 
These brownies are very rich! I highly suggest a glass, or a mason jar full of milk to go along side this ooey gooey goodness.

Twix Caramel Brownies

1 cup (2 sticks) butter
2 cups granulated sugar
2 teaspoons vanilla extract
4 large eggs
3/4 cup cocoa
1 cup all-purpose flour
1/2 teaspoon baking powder
1/4 teaspoon salt
1 1/2 cups chopped Twix candy bars
1/3 cup caramel ice cream topping
directions:


1. Heat oven to 350°F. Grease a 9 x 13 pan with cooking spray. Set aside.

2. Place butter in medium saucepan on the stove. Heat over medium heat until butter is melted. Remove from heat and stir in sugar and vanilla extract. Add eggs, one at a time, beating well with spoon after each addition. Add cocoa; stir until well blended. Add flour, baking powder and salt; stir until combined. Stir in Twix candy bar chunks. Pour batter into prepared pan.

3. Drizzle caramel evenly over the brownies. Using a toothpick, swirl caramel into brownies. Bake for 35-40 minutes or until brownies begin to pull away from sides of pan and a toothpick inserted in the middle comes out clean. Cool brownies completely in pan on a wire rack. Once cool, cut into squares and serve.


Sunday, September 11, 2011

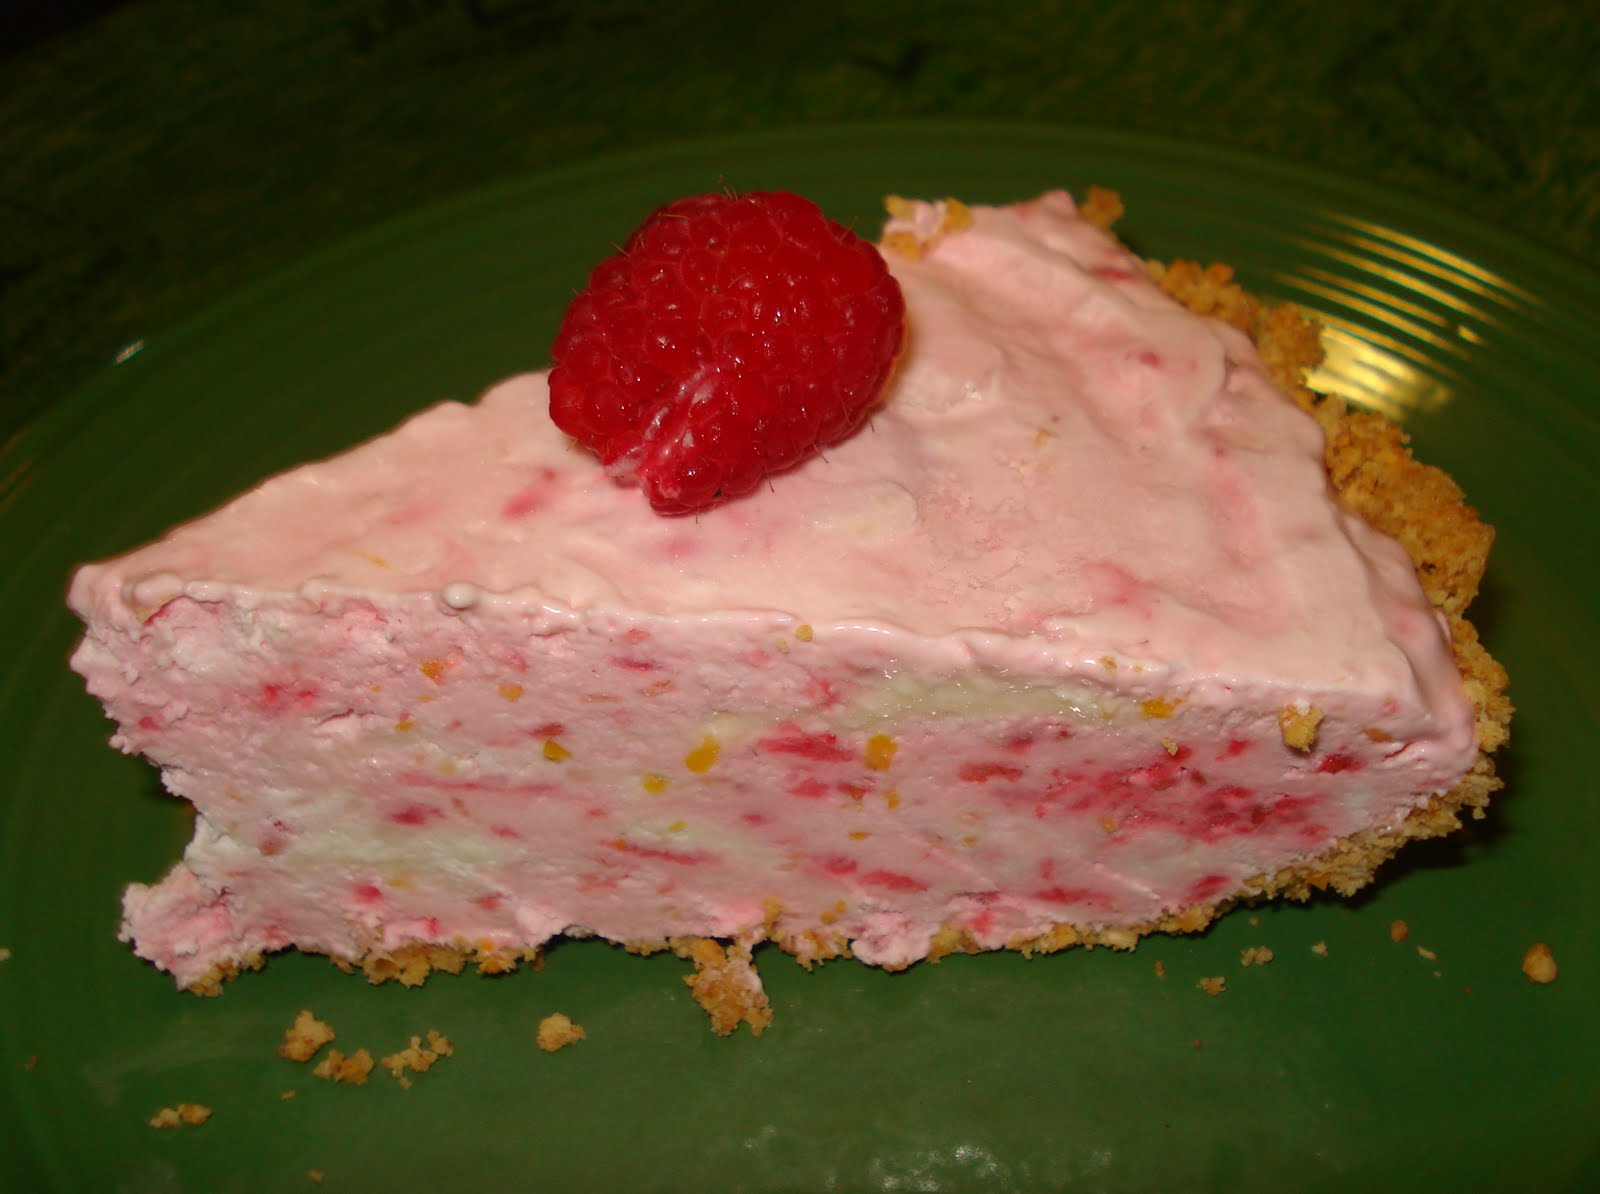
No Bake Raspberry-Lemon Cheesecake

My parents have been in town this past weekend, hence the lack of posts. We have been busy. :)
They came in to go to the National Cowboy Symposium, which I will post about later, for my Dad's birthday. My Mom's birthday is this Tuesday, September 13th, so my Dad and I planned a birthday dinner for her. 
This delicious light dessert was her "birthday cake". It was absolutely wonderful!! It wasn't thick like cheesecake normally is, you add whipped topping  to the cream cheese and it makes it light and fluffy.
You freeze it instead of baking it. It is a nice, quick dessert. One that you could make and put in the freezer to keep for a later time. Just plan on letting it freeze for a few hours before you serve it. You could also make 6 individual servings instead of a pie.

No Bake Raspberry-Lemon Cheesecake

For the crust:
3/4 cup graham cracker crumbs
1 tablespoon sugar
3 tablespoons unsalted butter, melted

For the filling:
2/3 cup sugar
zest on 2 lemons
1 (8 ounce) package cream cheese, softened
2 teaspoons fresh lemon juice
1 teaspoon pure vanilla extract
1 (8 ounce) tub frozen whipped topping, thawed
1 cup fresh raspberries, slightly mashed with a fork


1. In a medium bowl, stir together the graham cracker crumbs and 1 tablespoon of sugar and melted butter. Evenly divide the crumbs between your individual serving dishes and press into the bottoms of the dishes to form a crust layer.
2. In a large bowl, mix together the sugar and lemon zest until the sugar becomes moist and fragrant. Add cream cheese and beat with an electric mixer until smooth. Add lemon juice and vanilla mixing to combine. Using a rubber spatula, fold in the whipped topping until well blended, then fold in the raspberries.
3. Evenly pipe or spoon the filling into individual serving dishes. Cover with plastic wrap and refrigerate for at least 2 hours before serving. If desired, garnish with fresh raspberries and a sprig of fresh mint.


RECIPE NOTES FROM MY BAKING ADDICTION:

-If you make this into one pie, simply pour the cream cheese mixture into a 9-inch graham cracker crust and chill for 3 hours before serving.
-This recipe tastes really delicious with blueberries and strawberries as well. Play around with different fruit combinations to create a wide range of flavors.
-I have not tried this recipe using fresh whipped cream, so I cannot attest to the results.

Recipe From: My Baking Addiction

Tuesday, August 23, 2011

Fresh Peach Pie

This recipe is for Shelly, sorry to keep you waiting!
This fresh peach pie is wonderful! My husband's favorite pie is an apple pie, but he forgets all about apple pie when he bites into this peach pie.
The fresh peaches I bought had so much flavor and when combined with cinnamon and nutmeg, two of my favorite spices, it takes the peaches to a whole new element. The problem with this pie is waiting for it to cool down so I can cut into it to eat it! I'll be honest I hardly ever wait for a pie to cool completely. I like a warm piece of pie with a good scoop of plain old fashion vanilla ice cream. Now that is a tough dessert to beat!


Peach Pie 

6 cups Sliced Peeled Peaches 
 1 whole Lime, Juiced 
 ½ cups All-purpose Flour 
 1 cup White Sugar 
 ½ teaspoons Ground Cinnamon 
 ¼ teaspoons Ground Nutmeg 
 ¼ teaspoons Salt 
 1 whole Egg Beaten
 2 Tablespoons Butter 

You will also need one batch of your favorite pie crust recipe or pre-made pie crusts. Enough for two, this is a double crust pie. 
Preheat oven to 450 degrees. 
Toss the peaches with the lime juice and then drain off excess lime juice and peach juice. 
Mix together the flour, sugar, cinnamon, nutmeg, and salt. Then combine with the peaches. 
Line a 9 inch pie plate with one pie crust and brush the entire thing with egg. 
Pour the peaches into the pie pan, dot with the butter and top with the other pie crust. Pinch the edges, cut a few slits and brush the top with egg. 
Bake in preheated oven for 10 minutes and then reduce heat to 360 degrees and bake for another 30 -35 minutes. 
Let cool then serve.

Pie Crust 

2 1/4 cups flour 
 3/4 to 1 cup vegetable shortening 
 1 tsp. salt 

Cut shortening into flour and salt with a fork or a pastry blender until you get crumbles the size of a pea. 
6 Tbsp. cold water Add the cold water to the dough and work together with hands. Do not over work dough! It will become too tough. Roll out for pie pans. Use pie filling of choice. This recipe will make enough to do one double crusted pie or two single pie shells

Tuesday, August 16, 2011

Homemade Ice Cream (No Ice Cream Machine Needed)

Now I know this isn't peach pie, sorry Shelly! I made one but my crust was not cooperating with me and it didn't turn out right. I will be making another one so I can take a picture of how wonderful it is and post it.

Anyway on to the ice cream! Now, I will say this ice cream doesn't turn out quite like the ice cream in an ice cream maker, but it is oh so good! 
It is so simple as well, all you need is some heavy whipping cream and a can of sweetened condensed milk. Mix those with your favorite ice cream ingredients and voila, you have delicious ice cream!


I added a teaspoon of vanilla and mini Reese's pieces cups. 
Yum!


Homemade Ice Cream


14 ounce can sweeten condensed milk
2 cups heavy cream
1 tsp vanilla
40 Reese's Mini Peanut Butter Cups, quartered (or mix in of your choice)


 In a large bowl, whisk or stir together the sweetened condensed milk and the peanut butter cups.
In the bowl of an electric mixer with a whisk attachment, whip the heavy cream and vanilla on medium-high speed until stiff peaks form. Gently fold the whipped cream into the sweetened condensed milk mixture, until thoroughly combined. Transfer to an airtight container and store in the freezer. (Will take about 6 hours or so until mixture is completely frozen.)
Recipe From: Kevin and Amanda

Tuesday, August 9, 2011

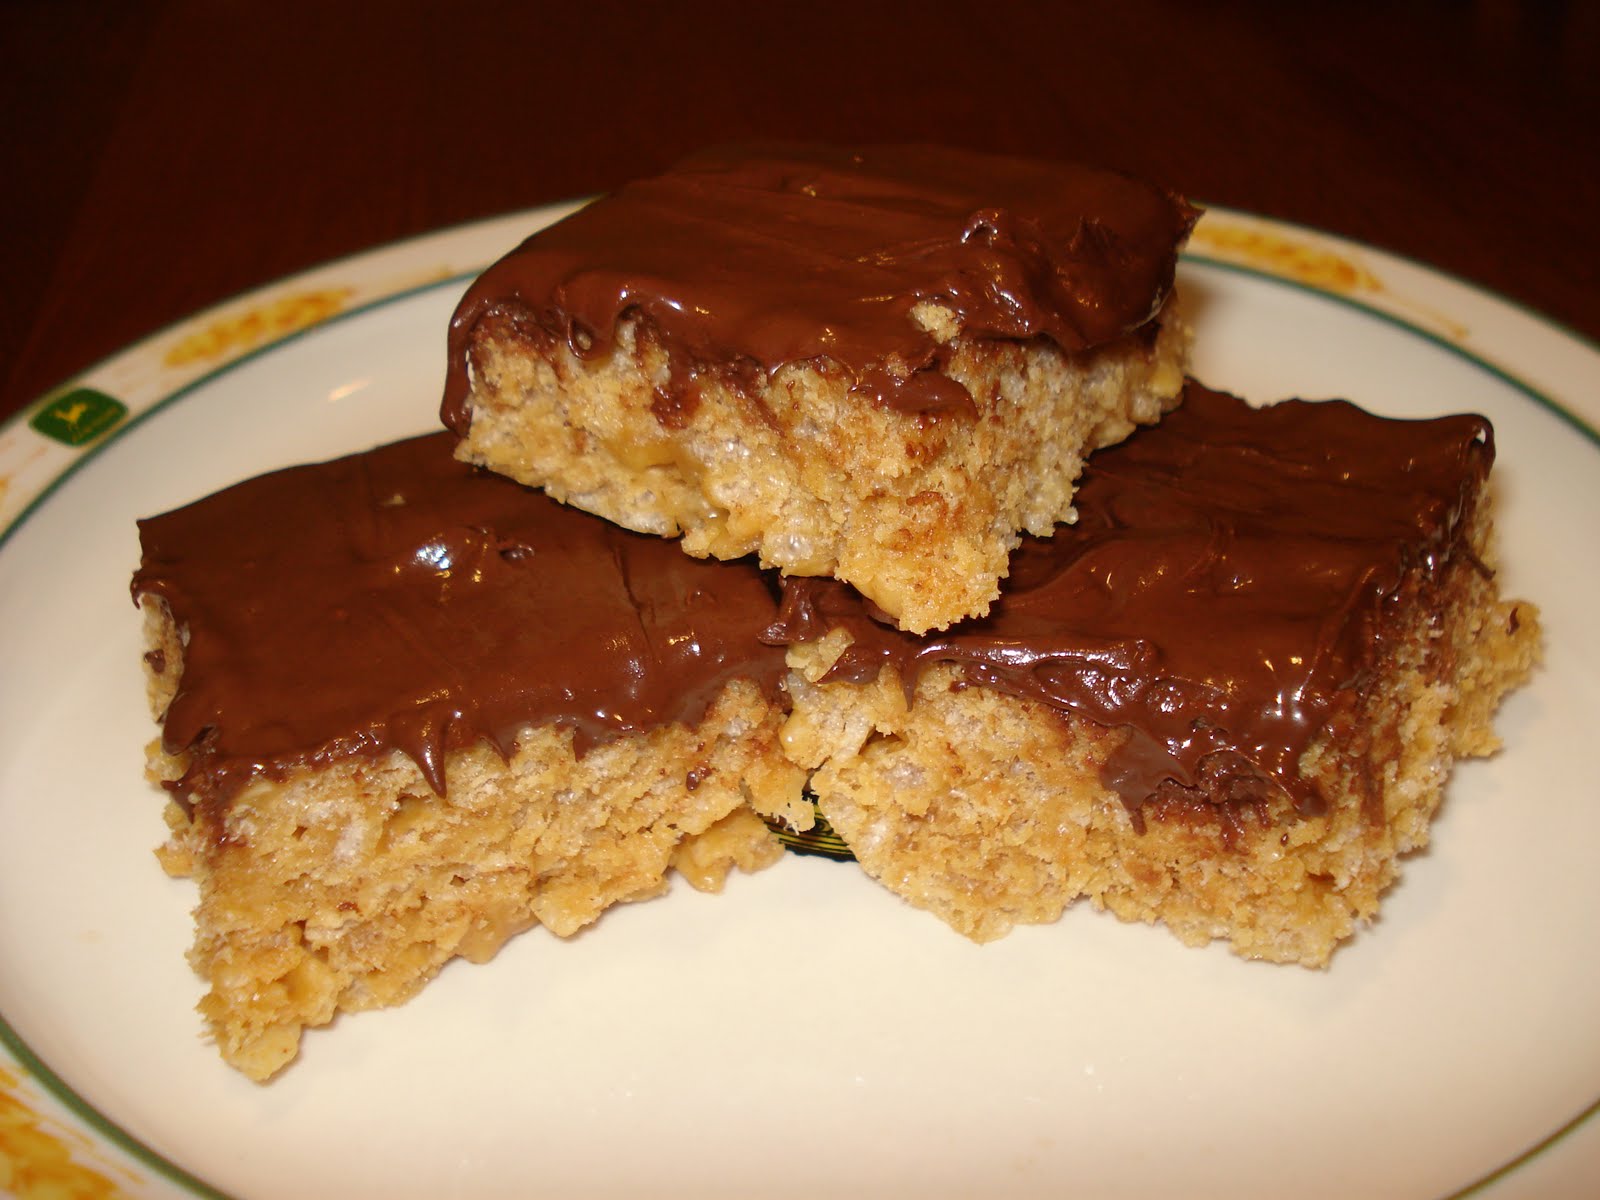
Scotch-A-Roos

What is a scotch-a-roo you ask? They are peanut butter rice krispies with butterscotch chips melted on top. 
They are wonderful!!
Now I didn't have any butterscotch chips, the hubby isn't a fan so I made them with semi-sweet chocolate chips. They are just as delicious this way as well. Now in my perfect world, they would be half chocolate half butterscotch. I think that is the best way to have them in my opinion. 
This treat is perfect if you are in need of making a quick dessert. They would be a great after school snack with a tall glass of milk also.
Enjoy!


Scotch-A-Roos


1 cup sugar
1 cup creamy peanut butter
1 cup light corn syrup
6 cup Rice Krispies
1 (12oz.) bag butterscotch chips or chocolate chips or both


Bring to a boil; sugar and corn syrup. Remove from heat. Mix in peanut butter well. Add Rice Krispies. Mix. Press into a buttered 9x13 pan. Melt chips and spread over the top of the mixture. Let cool before cutting into bars.

Sunday, June 26, 2011

Caramel Oatmeal Chewies

I warn you this dessert is addicting!! 
The first time I had this delicious dessert of chocolate, caramel and oatmeal was at a clothing, accessories, shoe party that was held by one of the Scharman sisters. I didn't buy anything, but I sure did eat a lot of these caramel oatmeal chewies. I think I had about 4 to be exact. I made Erin give me the recipe right after I ate the first one. I didn't want to leave the party without that recipe in my hand!


I hadn't been able to make them till this past memorial day. We went to a BBQ on memorial day and I volunteered to bring the dessert. I decided this dessert would be perfect for adults and kids. 
It was a big hit! 
Having it with a side of ice cream just made it that much better.


Carmel Oatmeal Chewies

1 ¾ cup Oats
1 ¾ cup Flour, divided
¾ cup packed brown sugar
½ teaspoon baking soda
¼ teaspoon salt (optional)
¾ cup (1 ½ sticks) butter or margarine, melted
2 cup (12 oz pkg) semi-sweet choc chips
1 cup chopped nuts
1 cup caramel ice cream topping

Preheat oven to 350. Grease bottom of 13 x 9 pan.
Combine oats, 1 ½ C flour, brown sugar, baking soda and salt in large bowl. Stir in butter; mix well. Reserve 1 C oat mixture; press remaining oat mixture onto bottom of baking pan.
Bake for 12-15 minutes or until golden brown. Sprinkle w/ morsels and nuts. Mix caramel topping with remaining flour in small bowl; drizzle over morsels to within ¼ in. of pan edges. Sprinkle with reserved oat mixture.
Bake for 18 – 22 minutes or until golden brown. Cool in pan on wire rack; refrigerate until firm.


Saturday, June 18, 2011

Key Lime Pie

My friend Marybeth and I usually have a night once a week or every other week where we cook something together. It has all been dessert items and this pie was what we decided to make this week. I even squeezed all of the key limes by hand! Well worth it in my opinion.

 Is there anyone out there who doesn't like key lime pie? It is just to delicious too say no to a slice, or two, or three! It is so refreshing to eat on these HOT summer days. I love the tartness mixed with sweet. Though this pie isn't as tart as you think. So those of you who are unsure about it being too tart you don't need to worry. 

It is probably one of the most perfect desserts for summer. There is something about a homemade graham cracker crust that makes the pie even better. I love making things from scratch, food just seems to taste better that way to me. 

This recipe is super simple! If don't want to squeeze all those key limes you could just buy some key lime juice in a bottle. I squeeze a lot of those little limes to get 7 tablespoons. :)
It's a make ahead recipe so it can sit in the fridge overnight, or at least up to 4 hours so it will be all ready when you need it. You will just have to whip up some fresh whipped cream to dollop on top!

Key Lime Pie

10 honey graham crackers (the whole cracker, not just a square)
2 1/2 Tbsp. sugar
6 Tbsp. butter, melted
zest from 1/2 large lime (I zested 2 small key limes)
7 Tbsp. freshly squeezed juice from key limes
1 can (14oz) sweetened condensed milk
4 egg yolks

Preheat oven to 350 degrees and prepare 9 inch pan.
In bowl of food processor, pulse graham crackers and sugar until broken down into fine crumbs.
Add melted butter and pulse until loosely combined.
Remove bowl from processor and, using spatula, stir to combine butter well.
Scrape graham mixture into pie pan and carefully press to evenly coat bottom and sides of pan.
Place shell into oven and bake for 10 minutes.
Remove from oven and set aside (keep oven on)
In large bowl, combine remaining ingredients and stir until combined well (this will take a minute or two, make sure the mixture is even).
Carefully pour mixture into pie shell and lightly tap to evenly distribute filling.
Place carefully into oven and bake for 15 minutes or until set.
Remove from oven and let cool.
Once cooled, place into fridge for at least 4 hours and preferably overnight to set.
Serve with whipped cream and enjoy.     

Recipe Taken From: Good Things Catered                                                     

Friday, June 3, 2011

Lemon Raspberry Bars

Dave has been asking me to make this lemon raspberry bars for months!
We were going to make them for Easter, but ending up making the chocolate fudge ice cream pie. Both recipes are delicious in their own way. I think Dave would pick the chocolate fudge ice cream pie more over the lemon raspberry bars, and I think I would pick the lemon raspberry bars over the chocolate fudge ice cream pie. He likes chocolate more in his dessert, and I prefer fruit. Though you wouldn't know that from how he devoured this dessert. I believe I only got one piece of these lemon raspberry bars and Dave ate the rest of the pan! Now it wasn't a big pan, and he ate it over a few days.
I love it when he likes what I make! 
These were delicious! I love the combination of sweet and sour, (which reminds me I should make strawberry lemonade bars! I don't think I posted those on here) I am a huge fan of lemon treats! Something about the tartness paired with the sweetness just makes my mouth smile. 
Of course my good friend Lindsey is wondering then why don't you love Sour Patch kids? She loves that candy! I can handle one or two, but I think those are a little over the top sour and sweet. My mouth can't handle that.
These lemon raspberry bars are a  perfect treat for those summertime BBQs I am sure you all are having or attending to this summer.
The recipes is very simple, you can make them the night before and then just pull them out of the fridge when you are ready to eat them.

Lemon Raspberry Bars

For the crust:
1 1/2 cup graham cracker crumbs
6 tablespoons salted butter, melted
1/4 cup sugar
Zest of one lemon

For the filling:
2 large egg yolks
1-14 oz. can fat free sweetened condensed milk
1/2 cup fresh lemon juice
1 teaspoon lemon zest
6 ounces fresh raspberries

Preheat the oven to 350F. Spray a 8 by 8 inch baking dish with cooking spray. Set aside.
In a medium bowl, combine the graham cracker crumbs, melted butter, sugar, and lemon zest. Stir until graham cracker crumbs are moist. Press crumbs into the prepared pan, pressing the crust mixture one inch up the side of the pan. Bake for 10 minutes. Remove from oven and allow to cool to room temperature.
Once the crust is cool, combine the egg yolks and condensed milk until well mixed. Stir in the lemon juice and lemon zest. Stir until mixture begins to slightly thicken. Gently fold in the raspberries. Fold carefully so you don't break the raspberries.
Pour the lemon raspberry filling evenly over the graham cracker crust. Bake for 15 minutes, or until just set.
Cool to room temperature, then chill for at least one hour before serving. Cut into bars and serve. Keep bars in the refrigerator-up to five days.
*Note-use fresh raspberries and make sure you gently fold the berries into the lemon filling or you will have pink bars.


Recipe Taken From: Two Peas and Their Pod

Thursday, April 28, 2011

Chocolate Fudge Ice Cream Pie

You must try this pie!! It is wonderful!
My husband loves cookies and cream ice cream, so this pie was right up his alley.
I loved the hot fudge and Cool Whip on top, and lets not forget that amazing Oreo cookie crust! I saw this recipe on Jamie Cooks It Up! at the beginning of this month. When I went home both my sister-in-laws had made it and they highly suggested I make it when I returned home.
I decided it would be a lovely dessert for Easter Sunday to cool us off in this hot Texas weather. It hit the spot right on!
It is a very simple dessert to make. I even made it easier by getting a pre-made Oreo cookie crust. Though next time I would make my own, I am the type of person that if I can make it I would rather do that then pay for one that is made already. I only bought one this time, because I forgot the recipe said to make the Oreo crust. 
I don't think this pie is going to last long in our freezer with Dave's love of cookies and cream. :)

Chocolate Fudge Ice Cream Pie 

45 Oreo Cookies (about three sleeves)
4 T melted butter
1 half gallon Cookies and Cream Ice Cream, softened
1 C hot fudge
1/2 an 8 oz container Cool Whip
Mini Chocolate Chips (optional) 


***Note: You'll want to let your ice cream hang out on the counter for about 15 minutes before making the pie. 
Thank you very much. End of note***

 1. Put 30 of your Oreo Cookies in a small food processor. Grind them up into fine crumbs and pour them into a small mixing bowl.
2. Pour the melted butter into the crumbs and stir to combine. 
3. Press the crumbs into a Deep 9 inch pie plate. Use the bottom of a measuring cup to press the crumbs evenly into the pie plate.
4. Put the remaining Oreo Cookies into the food processor. Grind them just for a few seconds. You just want them to be coarsely chopped here, not smashed to smithereens. Unless you like crumbs in your ice cream. If so, be my guest. Smash the heck out of them.
5. Scoop your softened ice cream into a large mixing bowl. Add your chopped (or smashed to smithereens) Oreos to the ice cream and fold them in. (I though the ice cream had enough so I didn't add any extra.)
6. Spread the ice cream out evenly over your tasty crust.
7. Carefully spoon the hot fudge onto the ice cream and spread it around. Yum. 
8. Spread the cool whip on over the top of the fudge.
9. Wrap that bad boy up with some plastic wrap and get it into the freezer. Let it remain there for at least 4 hours.
10. Take the pie out of the freezer about 10 minutes before serving. Sprinkle the top with mini chocolate chips, if you so desire. (I used mini Oreo Cookies on the top instead of chocolate chips.) Then....slice it up....serve it up...put your feet up....and enjoy! You deserve it!


If any of you can explain to me how to fix the spacing on this I would greatly appreciate it! I don't know why some is singled space and some is doubled it. It annoys me greatly!

Tuesday, February 22, 2011

Banana Foster

The ice cream started to melt before I got a good picture of this. 


The first time I had a banana foster was at the La Caille restaurant back home in Utah. There they actually light the rum (if you use the rum, I didn't when I made this) on fire and burn off the alcohol. It is a very exciting dessert! Then I didn't have one for many years later until one night at our good friends the Rogersons, Nino cooked us up some. I was impressed with how he could take a few simple ingredients and make something so good!
 We had this delicious dessert for on Valentine's Day! I had been craving it for a strait week before we had them. I love bananas and when you put them in a nice hot caramel sauce you can't go wrong!

Banana Foster

1 stick butter
1/2 cup brown sugar
4 bananas, peeled and cut into slices or cut lengthwise
1/4 cup dark rum, optional (it is just as good without it)
vanilla ice cream (optional)
pound cake (optional)

In a large skillet, melt the butter. Using a wooden spoon, add brown sugar and stir together. Add the bananas and cook until caramelized on both sides, over medium-high heat. Move pan off heat, add the rum and return to the stove to catch a flame from the gas stove or a long lighter. Stand back when ignited and flambe the bananas. Be careful a flame will shoot up above the pan. Let flame die down and the alcohol cook out. Serve bananas over vanilla ice cream and/or a slice of pound cake.

I am good with just a good old bowl of vanilla ice cream and the caramel banana sauce. :)


Sunday, November 7, 2010

Apple Dumplings


I made this lovely dish the other night. Let me tell you, it was delicious! And probably one of the easiest desserts I have ever made. I found it on The Pioneer Woman's website. I seem to be cooking a lot of her stuff lately. She just makes such yummy stuff. It does have a strange ingredient for a dessert, but don't be fooled by the Mountain Dew it did wonders on this dish. I am not exactly sure how but it did, just take my word for it.


Apple Dumplings

2 whole Granny Smith Apples
2 cans (8 Oz. Cans) Crescent Rolls
2 sticks Butter
1-½ cup Sugar
1 teaspoon Vanilla
Cinnamon, To Taste
1 can (12 Oz.) Mountain Dew Soda
Peel and core apples. Cut each apple into 8 slices each. Roll each apple slice in a crescent roll. Place in a 9 x 13 buttered pan.
Melt butter, then add sugar and barely stir. Add vanilla, stir, and pour entire mixture over apples. Pour Mountain Dew around the edges of the pan. Sprinkle with cinnamon and bake at 350 degrees for 40 minutes. Serve with ice cream, and spoon some of the sweet sauces from the pan over the top.


Easy Peasy!

Sunday, October 10, 2010

Canned Peach Pie Filling

I love peach pie! Better yet I love my Mom's peach pie filling. So when I canned peaches this year, that is all I canned was peach pie filling. :)

 I used these lovely peaches I bought up in Brigham City from a produce stand. I had to wait a couple weeks for them to ripen.


Pure goodness right out of the processor!


 Look at all the peach pie I can make! Yummy!

This pie filling also works for apples as well.


Apple/Peach Pie Filling

Peel and slice fruit to fill jars approximately 3/4 full.

4 1/2 cup sugar
1 cup cornstarch
2 tsp. cinnamon
1/2 tsp. nutmeg
1 tsp. salt

Combine all of the above ingredients with 10 cups of cold water. Cook until thick and bubbly. Then add 1/2 cup lemon juice. Pour mixture over fruit and seal. Process for 20 minutes.

You should give this canning recipe a try! It can get sticky and messy but well worth it!