Thursday, June 30, 2011

Triple Chocolate Oreo Chunk Cookies

Who loves chocolate? 
I am sure like 99.9% of you said that you love chocolate.


This cookie is chuck full of chocolate! White chocolate, semi-sweet  chocolate, cocoa powder and of course Oreo Cookies!
This are some extremely rich cookies! I highly recommend eating these cookies with a tall class of milk.
And just like Oreo cookies these cookies are addicting, so you might need a couple of glasses of milk.
Now I didn't have a block of the semi-sweet and white chocolate, I just used the chocolate chips I had on hand and I think those worked just fine. 


Be sure to store them in an airtight container.


Triple Chocolate Oreo Chunk Cookies


2 1/2 cups all-purpose flour
1 teaspoon baking soda
1/4 teaspoon salt
3/4 cup dutch processed cocoa
1 cup unsalted butter, at room temperature
1 cup granulated sugar
1 cup light brown sugar
2 large eggs
2 teaspoons vanilla extract
1 cup chopped white chocolate
1 cup chopped semi-sweet chocolate
1 cup chopped Oreo cookies


1. Preheat oven to 375 degrees F. Line a baking sheet with parchment paper or silicone mat. Set aside.
2. In a medium bowl, sift flour, baking soda, salt, and cocoa. Set aside.
3. With a mixer, cream butter and sugars together until smooth. Add in eggs, one at a time. Next, add in vanilla extract. Mix until blended.
4. Slowly add flour mixture to sugar mixture and mix until flour disappears. Stir in chocolate chunks and Oreos. Drop cookie dough by rounded tablespoons onto prepared baking sheet, about 2 inches apart.
5. Bake cookies for 8-10 minutes. Don't over bake. Remove from oven and let sit on baking sheet for 3-5 minutes. Move to a cooling rack and cool completely.

Recipe Taken From: Two Peas and Their Pod

Pork Sandwiches With Cilantro-Jalapeño Slaw

Now I must admit I am not a huge fan of sweet pork. Well that has all changed! Now I made this recipe this last Sunday. I had bought a pork butt roast that was a little over 3 pounds. The recipe says to cook the roast for 6 hours. I decided I would put the roast in the oven once I got back from taking David to work in the morning. So I put it in at 5 A.M, and decided I would shred it when I got back from church. Which means the roast was going to be in the oven an hour more then planned. No biggie I thought. 


As I got walked into the garage I could smell the aroma of the meat. It smelled divine! I was so excited to see how delicious the pork would look. As I opened the dutch oven I was surprised to find a big black sticky glob! 


No need to fear though! 
As I dug into the pork to see what the inside look liked it was perfect!
Even though I had over cooked my little roast (I went back to the recipe and noticed they had used a 7 pound roast) it had a nice coating of flavor.
Now after you shred the pork you are suppose to put it back in the juices that were in the dutch oven. Well since I couldn't do that I decided to put it in a crock pot and pour more Dr. Pepper in. 
It worked well, but I do think it would have tasted just a little bit better if it had a chance to sit in the onions and chilies too.


So note to self: when trying new recipes DO NOT LEAVE UNATTENDED. :)


Also this pork would be great for tacos, burritos, or salads as well!


Now if you don't like spicy things, just leave out the jalapeño in the coleslaw. With the cayenne pepper and the jalapeño together it makes for some good heat in the slaw. 
And if you don't like coleslaw at all, that is okay as well! I think these sandwiches would be good with some melted pepper jack cheese on them or just plain on the bun.


Pork Sandwiches with Cilantro-Jalapeño Slaw


1 whole Onion, Peeled And Quartered
1 whole Pork Butt (pork Shoulder Roast)
Salt And Pepper
1 can (11 Ounce) Chipotle Peppers In Adobo Sauce
2 cans Cola (Dr Pepper, Coke, Etc.)
2 Tablespoons Brown Sugar
12 whole Good Quality Kaiser Or Deli Rolls
12 Tablespoons Butter
1/2 head Cabbage, Sliced Thin
1/2 head Purple Cabbage, Sliced Thin
1 whole Jalapeño, Halved Lengthwise And Thinly Sliced
1/2 cup Whole Milk
1/2 cup Mayonnaise
1 teaspoon White Vinegar
1 Tablespoon Sugar
1/4 teaspoon Salt
1/4 teaspoon Cayenne Pepper
2 cups Cilantro Leaves, Barely Chopped


MEAT

Preheat oven to 300 degrees.
Generously salt and pepper the pork roast, then set it on top of the onions in the pan.
Pour the can of chipotle peppers over the pork (include the sauce.) Pour in both cans of Dr Pepper. Add brown sugar to the juice and stir in.
Place lid tightly on pot, then set pot in the oven. Cook for at least six hours, turning roast two or three times during the cooking process. Check meat after six hours; it should be absolutely falling apart (use two forks to test.) If it’s not falling apart, return to the oven for another hour.
Remove meat from pot and place on a cutting board or other work surface. Use two forks to shred meat, discarding large pieces of fat. Strain as much of the fat off the top of the cooking liquid as you can and discard it. Return the shredded meat to the cooking liquid, and keep warm until ready to serve. (You can also refrigerate the meat and liquid separately, then remove hardened fat once it’s cold. Then heat up the liquid on the stovetop and return the meat to the liquid to warm up.)
SLAW
Combine shredded cabbage and sliced jalapenos in a bowl. In a separate bowl mix milk, mayonnaise, vinegar, sugar, salt, and cayenne. Pour over cabbage. Toss to combine. Cover and refrigerate two hours.
Before serving, toss in cilantro leaves.
SANDWICHES
Butter both halves of Kaiser rolls, then brown them on a griddle or skillet until golden and crisp on the surface. Load up each sandwich with shredded pork, then REALLY load them up with the slaw.
The magic is in the combination of the hot liquid from the meat and the cool, creamy liquid from the slaw.


Recipe Taken From: The Pioneer Woman

Wednesday, June 29, 2011

Enduring

Even with this horrible heat we are having my green pepper plants are enduring! 
I have several of these peppers growing on my 3 plants. So excited!!!

My jalapeño plants are even starting to get a little taller.

They have a long ways to go though if they want to catch up to my tomato plants! They are overtaking the whole planter box. Now hopefully they just produce LOTS of tomatoes. I have many things planned for them, salsa, spaghetti sauce, BLTs.....

I think that water system we decided to put in has been working really well, especially in this hot weather.

Monday, June 27, 2011

You Know It's Hot When...

When your tool case you left in your car melts!!
This 106 degree weather is getting out of hand!

Sunday, June 26, 2011

Caramel Oatmeal Chewies

I warn you this dessert is addicting!! 
The first time I had this delicious dessert of chocolate, caramel and oatmeal was at a clothing, accessories, shoe party that was held by one of the Scharman sisters. I didn't buy anything, but I sure did eat a lot of these caramel oatmeal chewies. I think I had about 4 to be exact. I made Erin give me the recipe right after I ate the first one. I didn't want to leave the party without that recipe in my hand!


I hadn't been able to make them till this past memorial day. We went to a BBQ on memorial day and I volunteered to bring the dessert. I decided this dessert would be perfect for adults and kids. 
It was a big hit! 
Having it with a side of ice cream just made it that much better.


Carmel Oatmeal Chewies

1 ¾ cup Oats
1 ¾ cup Flour, divided
¾ cup packed brown sugar
½ teaspoon baking soda
¼ teaspoon salt (optional)
¾ cup (1 ½ sticks) butter or margarine, melted
2 cup (12 oz pkg) semi-sweet choc chips
1 cup chopped nuts
1 cup caramel ice cream topping

Preheat oven to 350. Grease bottom of 13 x 9 pan.
Combine oats, 1 ½ C flour, brown sugar, baking soda and salt in large bowl. Stir in butter; mix well. Reserve 1 C oat mixture; press remaining oat mixture onto bottom of baking pan.
Bake for 12-15 minutes or until golden brown. Sprinkle w/ morsels and nuts. Mix caramel topping with remaining flour in small bowl; drizzle over morsels to within ¼ in. of pan edges. Sprinkle with reserved oat mixture.
Bake for 18 – 22 minutes or until golden brown. Cool in pan on wire rack; refrigerate until firm.


Saturday, June 25, 2011

Quiche

It has been a LONG time since I have had quiche. I think the last time I had it I was about 12. I didn't care for it at the time. 
I am one of the activity days leaders for my church congregation (activity days is for girls ages 8 to 11), and for one of the activities we had a cooking night and made this quiche. Boy have I been missing out!! 
Holly (the other activity days leader, yes we share the same name just spelled differently) had this recipe. She took a cooking class a couple years ago and it was in the cook book the teacher gave her. 
It was delicious!! We put bacon, broccoli and cheese in the one we made with the girls. When I decided to make one at home for the hubby and I, I wanted to put artichoke hearts, spinach, bacon, cheese and mushrooms in it. Hubby wanted just ham and cheese in it. :(! Don't get me wrong it was still good! Just not as exciting to my taste buds as the other ingredients would have been. The great thing about quiche is, is that you can add whatever you want to it. It is kind of like a baked omelet in a pie shell. 
For those who have little kids, I believe this would be a good way to hide those servings of vegetables that little kids don't always like to eat.
Give it try! See what you think. 
I am curious, what would you or did you put in your quiche?
Also, this isn't just a breakfast item, you could have quiche for breakfast, lunch or dinner.

Quiche

1 pie crust (recipe to follow)
2 large eggs
1 egg yolk
1/4 teaspoon of salt
1/4 teaspoon of pepper
3/4 cup heavy cream
1/2 teaspoon cream of tartar
Ingredients of your choice (broccoli, bacon, asparagus, etc.)

Mix all ingredients in a bowl. Pour custard into pie crust and bake at 350 for 15 - 20 minutes or until knife comes out clean. (Mine took about 30 minutes I believe.)

Pie crust (makes 1 crust)

1 1/8 cup of flour
1/2 cup of shortening
1/2 teaspoon salt
3 tablespoons cold water

Cut shortening into flour and salt with a fork or a pastry blender until you get crumbles the size of a pea.

Add the cold water to the dough and work together with hands. Do not over work dough! It will become too tough. 
Roll out for pie pan. 


Wednesday, June 22, 2011

Chocolate Swirl Banana Bread

What a wonderful twist on plain old banana bread! I thoroughly enjoyed the chocolate batter marbled through this bread. 
In fact, I would probably make banana bread this way all the time! My husband informed though that as much as he loved this banana bread I need to still make regular banana bread too. Since I do the baking though I get to decided how often we have regular banana bread and chocolate banana bread. :)
You will love this bread! I would like to think it is a pretty healthy bread, even with the chocolate. Chocolate is healthy for you right? At least I have been told dark chocolate is. 
Any way, healthy or not, make the bread you won't be disappointed with the outcome!

Chocolate Swirl Banana Bread

2 cups all-purpose flour
3/4 teaspoon baking soda
1/2 teaspoon salt
1 cup sugar
1/4 cup butter, softened
1 1/2 cups mashed ripe banana (about 3 bananas)
2 extra large eggs
1/3 cup plain low-fat yogurt (or sour cream)(I used sour cream)
1/2 cup semisweet chocolate chips
                                                
Preheat oven to 350°. Lightly spoon flour into dry measuring cups, and level with a knife. Combine the flour, baking soda, and salt, stirring with a whisk.
Place sugar and butter in a large bowl; beat with a mixer at medium speed until well blended (about 1 minute). Add banana, eggs, and yogurt; beat until blended. Add flour mixture; beat at low speed just until moist.
Place chocolate chips in a medium microwave-safe bowl, and microwave at HIGH 1 minute or until almost melted, stirring until smooth. Cool slightly. Add 1 cup batter to chocolate, stirring until well combined. Spoon chocolate batter alternately with plain batter into an 8 1/2 x 4 1/2-inch loaf pan coated with cooking spray. Swirl batters together using a knife. Bake at 350° for 1 hour and 15 minutes or until a wooden pick inserted in center comes out clean. Cool 10 minutes in pan on a wire rack; remove from pan. Cool completely on wire rack.


Recipe Taken From: The Sister's Cafe

Tuesday, June 21, 2011

Garlic Lemon Chicken Kabobs

I love to grill! The hubby gets after me because we both like to grill and I will try  to beat him to it. Since he is the man he thinks it is his job, but I love to do it! I was all excited when summer hit so we could use the grill more. Sadly since it has been so hot outside it has been hard to justify cooking inside the house and even outside on the grill. 
I couldn't pass up these recipe for garlic lemon chicken kabobs though! They sounded so yummy and I was ready for something more then just a cold sandwich. The recipe called for just the zest of a lemon but I added the juice of half of the lemon to the marinade. Wonderful idea! I love lemon flavoring and chicken together.
I love summer recipes that are quick, easy and delicious!

Garlic Lemon Chicken Kabobs

3 tbsp. extra-virgin olive oil
Zest of 1 lemon
juice from 1/2 of lemon that was zested
3 cloves garlic, minced or pressed
1 tbsp. minced fresh parsley
1 tsp. kosher salt
½ tsp. ground black pepper
1 lb. boneless, skinless chicken breasts, cut into ¾-inch pieces


In a medium bowl, whisk together the olive oil, lemon zest, garlic, parsley, salt and pepper.  Add the chicken pieces to the bowl and mix to coat with the marinade.  Cover and refrigerate for at least 2 hours and up to 8 hours.
Prepare a medium fire in a grill.  If using wooden skewers, soak them in water for at least 20 minutes before use.
Thread the chicken pieces onto skewers and discard the excess marinade.  Lightly oil the grill grates.  Place the kabobs on the grill, cover, and cook until the chicken is opaque throughout, about 8-12 minutes, turning once or twice during cooking.  Transfer to a warmed platter and serve immediately.   


Recipe adapted from: Annie Eats                                        

Sunday, June 19, 2011

Father's Day

I would like to take a moment and tell my Dad Happy Father's Day!
He is more then a just a father to me, he is my friend. He is always willing to lend an ear when I need to talk, and will try to lift my spirits when I am down. 

He is: fun loving, hard-working, knowledgeable of random words, nature lover, cooking buddy and taste tester, worm drowner in hopes of catching large trout, harmonica blower, cowboy, spiritually strong, willing to learn new things so he can be a handy man.

I love him.

He makes me happy and I am so glad I get to call him Dad. 
I look forward to when I get to live a little closer so I get see him more often.

I would always like to tell my father in-law Stan Happy Father's Day!
He is an amazing man, I am so grateful for him and all that he does!
We love you!

Saturday, June 18, 2011

Key Lime Pie

My friend Marybeth and I usually have a night once a week or every other week where we cook something together. It has all been dessert items and this pie was what we decided to make this week. I even squeezed all of the key limes by hand! Well worth it in my opinion.

 Is there anyone out there who doesn't like key lime pie? It is just to delicious too say no to a slice, or two, or three! It is so refreshing to eat on these HOT summer days. I love the tartness mixed with sweet. Though this pie isn't as tart as you think. So those of you who are unsure about it being too tart you don't need to worry. 

It is probably one of the most perfect desserts for summer. There is something about a homemade graham cracker crust that makes the pie even better. I love making things from scratch, food just seems to taste better that way to me. 

This recipe is super simple! If don't want to squeeze all those key limes you could just buy some key lime juice in a bottle. I squeeze a lot of those little limes to get 7 tablespoons. :)
It's a make ahead recipe so it can sit in the fridge overnight, or at least up to 4 hours so it will be all ready when you need it. You will just have to whip up some fresh whipped cream to dollop on top!

Key Lime Pie

10 honey graham crackers (the whole cracker, not just a square)
2 1/2 Tbsp. sugar
6 Tbsp. butter, melted
zest from 1/2 large lime (I zested 2 small key limes)
7 Tbsp. freshly squeezed juice from key limes
1 can (14oz) sweetened condensed milk
4 egg yolks

Preheat oven to 350 degrees and prepare 9 inch pan.
In bowl of food processor, pulse graham crackers and sugar until broken down into fine crumbs.
Add melted butter and pulse until loosely combined.
Remove bowl from processor and, using spatula, stir to combine butter well.
Scrape graham mixture into pie pan and carefully press to evenly coat bottom and sides of pan.
Place shell into oven and bake for 10 minutes.
Remove from oven and set aside (keep oven on)
In large bowl, combine remaining ingredients and stir until combined well (this will take a minute or two, make sure the mixture is even).
Carefully pour mixture into pie shell and lightly tap to evenly distribute filling.
Place carefully into oven and bake for 15 minutes or until set.
Remove from oven and let cool.
Once cooled, place into fridge for at least 4 hours and preferably overnight to set.
Serve with whipped cream and enjoy.     

Recipe Taken From: Good Things Catered                                                     

Friday, June 17, 2011

Is It HOT Enough Yet?!

So the past few weeks in Lubbock, Texas so say the least have been awful!!! 
We have been over 100 degrees for a while now. Yesterday was 106, today was 107!!! 
Honestly, who can function properly in 107 degree weather?! 
I thought it was hot enough to fry an egg,


Apparently it's NOT hot enough to cook an egg. I could have sworn 107 degrees would be hot enough on the sidewalk that has been in the sun all day. 


This is what the egg looked like after and hour and a half in the sun. 
Maybe I will have to try it again but on something black that has been in the sun for hours.


Some things I have learned since being in this heat:


1. Bananas will go completely black after 4 days. I need to make sure to keep all fruit in the fridge. 
2. I am sticky all day long from sweating.
3. I need a pool if I plan to stay here the rest of summer. 
(I will be staying but  the only kind of pool I can fit in my yard is a kiddie pool. I would gladly take one!)
4. My cooking has slacked off a bit cause it is too hot to cook, inside or outside! 
5. Dave and I are breed for mountain weather! 
That or I am going to seriously need to invest in some shorts. 
(I only own 2 pairs, and one is falling apart.)


Even amidst this hot drought weather we are going through we are throughly enjoying our stay in the great state of Texas! 

Thursday, June 16, 2011

This Is The Garden Now....

After two weeks of the new watering system being into play this is how my garden looks now:

This picture is a little dark, but the tomato and pepper plants are doing AWESOME!!

I am still hoping that even though they are some what crowded the plants will still produce well.

There is at least some tomatoes surviving and growing!! HOORAY!

And yet there is still the issue of this planter box....I mean the carrots are doing well. All 2 bunches of them. :) 
But what is going on with the jalapeño plants?! They better be ready by the time I am ready to can salsa, or else!

Monday, June 13, 2011

Fountain Green Dinner Rolls

What is Fountain Green you ask? 
I have mentioned it before on this blog. For those that don't remember, it is a small town you can drive through on your way to Manti, Utah if you drive through Nephi canyon. If you blink you would miss it. For that reason alone I love it! I have driven to Fountain Green many times for Lamb Day, which I posted about last July.
In the Lamb Day post you will noticed I talked about the Noakes family. I got this recipe from Jody Noakes, who is an amazing lady and one of my favorite people! I don't know if this is the actual name of these rolls, on my recipe card it says dinner rolls, Fountain Green. Fountain Green Dinner Rolls sounded like a nice name, I know, I'm pretty creative. 
These rolls are delicious! I loved them! I haven't had them in so long I had forgotten how great these rolls are. I don't know if it is because they have powder milk in them, but something about them makes them extra tasty. 
I have been eating the left overs just plain since I made them Sunday. In fact I might go have another one right now. 
Another bonus! These rolls didn't take all day to make, they only took an hour and a half. Perfect to add to those Sunday dinners of roast, potatoes, carrots, and salad. Which is what I had for dinner Sunday, it was marvelous

Fountain Green Dinner Rolls
*Makes about 24 "large" rolls

2 1/2 cup very warm water
1/2 cup oil
1/4 cup sugar
2 eggs
6 cups flour, to start
1/2 cup powdered milk
1 Tbsp. salt
1 1/2 Tbsp. instant yeast

Put ingredients in mixer bowl in order given. Add enough additional flour to make a soft, slightly sticky dough. Beat in mixer for 5 minutes. Let raise in bowl until double in size (20-30 minutes). "Punch" dough down by briefly turning on mixer. Let rest 15-20 minutes. 
Spray cookie sheet with Pam, and dust with flour. Pour dough out onto cookie sheet (I forgot this part, and just left it in the bowl). Pinch off pieces of dough to form rolls, placing them on the same cookie sheet you are working off of. Let rise until double in size (20-30 minutes). 
Bake 350 F degrees for 15 minutes or until golden brown. Brush with butter right out of the oven.

Saturday, June 11, 2011

Extremely Easy Pumpkin Chocolate Chip Cookies

I know it's not fall yet, but I was craving pumpkin chocolate chip cookies the other day. Oddly I love these pumpkin cookies, pumpkin cake roll, pumpkin bread, pumpkin muffins, but I strongly DISLIKE pumpkin pie! 
I don't know what it is about pumpkin pie, it just doesn't tickle my fancy.
Anything else pumpkin I am totally sold!
This cookies are wonderful because they are like I stated for the post, EXTREMELY easy!
I have my friend Amber (Hello Amber, who now resides in beautiful Montana) to thank for this recipe. She loves pumpkin infused things too!
 I would like to think I knew about this recipe a long time ago but I think I forgot all about it, it is so simple how could I not remember?!
I usually double this recipe since I usually buy the pumpkin cans that are 30 oz instead of 15 oz.
I make these cookies a little bit on the bigger side so I don't get as many as it says you will get.

Easy Pumpkin Cookies

1 box Spice cake mix (just the dry cake mix, don't make the cake)
1 can (15 oz) canned pumpkin
1-2 cups chocolate chips (start with 1 cup, then decide if you need more)

Mix cake mix and pumpkin well, add chocolate chips. Bake at 375 degrees for 12 minutes. (I think I had to cook mine a little bit longer about 2-3 minutes more.)
Makes about 4 dozen cookies

Robin and Nick's Wedding

Well we made the LONG drive home to see my younger brother Nick marry that wonderful gal named Robin.
 (It was well worth the LONG drive, I would do it again in a heart beat!)
It was a beautiful day back in good Ol' Utah! A perfect day for those two love birds to get hitched.
Here are some pictures from the trip:

MOUNTAINS!!! 
I took this picture as soon as we got into Monticello, how I have missed them so!

Dad and me waiting outside the Mount Timpanogos Temple for the bride and groom.

Here is my Mom (she is on the far left) all of her sisters, my Grandma, and last but not least, my cousin Spencer.

They got hitched! 
HOORAY!!

Dave and me

The dessert table at the luncheon, those cream puffs are to die for!!
In fact, my Mom was nice enough to give us some for the road. They work well for breakfast as well.
All the desserts were amazing, thank you to those who shared their wonderful cooking talents!

Robin's sisters and Dad performed at the luncheon. This is just a small clip of the song. They did a wonderful job!

Nick and Robin, don't they look amazing?!

Me and Dave at the wedding reception.

 Look at this handsome fellow, this is my brother Blake.

My cute Grandma.

The wedding turned out beautifully! I wish I had taken more pictures, but I figured the photographer was doing a much better job then I was. :)

The next day we left at a bright and early time of 4 P.M. to head back to Lubbock. We would have left a lot sooner but the explorer on the trailer was giving us trouble. 
We didn't make it home till Midnight the next night. I would NOT recommend pulling a heavy trailer, we were able to go 55 the whole way home. Terrible.
But, we made it safe and sound. Now I am ready to go back, I enjoyed not having dust in the air, the lovely temperature of 85 instead of 102, and the mountains surrounding me. Plus, it was kind of a quick trip. 
Luckily we will be going home in July!!

Congratulations to Nick and Robin again!! I wish you guys the best!!

Wednesday, June 8, 2011

Garden Watering System and Progress

I am sad to say I have lost quite a few plants dew to this darn wind that won't stop blowing and extreme heat (it has reached over the 100 degree mark several times now) here in Lubbock.
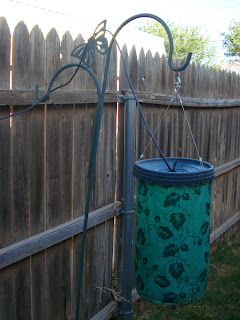
I will show you the water system we decided to try since we have had to drive home, and will be driving home again. We got a timer for our water to go off every 6 hours and water for 10 minutes through some black watering tubes.

It looks a little messy, we probably over watered a little while we tried to make sure everything worked.

This planter box gets plenty of water with this new system.

We snaked it through all the plants to make sure it watered all of them.

We  even had it rigged clear out to the topsy turvy, which by the way my roma tomato plant that was in there broke off just a couple days after we hooked up the water system. I think it was getting heavy, and with the wind blowing the way it was it just snapped off. It even had a tomato! Blasted Lubbock weather.

The timer, so far it has worked well. 

The carrots seem to be doing pretty well. We planted 2 rows and we only have 2 bunches of carrots growing.

I have ONE pea plant out of whole row a peas, and I will be lucky if it survives! You can tell it is drying out in places and you will notice the dead pea plant just to the left of it.

The tomato and green bell pepper plants seem to be doing well. Expect one tomato plant in the back left, it just doesn't seem to be growing at all. It is just a little bit bigger then the day we bought it.

Roma Tomatoes!!

Lemon boy tomatoes!

 David says they have a sour lemon taste to them.

Cosmo tried to eat one of the romas that had gotten wind blown.

There is lots of bell pepper blossoms!

Jalapeño plants, they aren't doing as well as I would like.

 And last but no least, my strawberry plant. Snff snff...how am I suppose to make fresh strawberry jam now?!